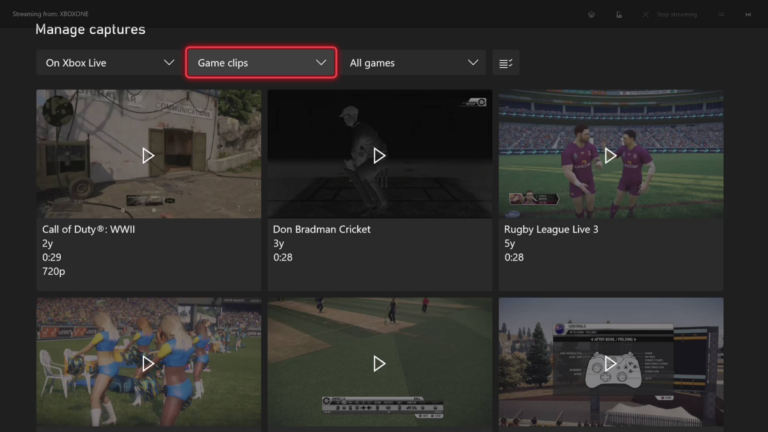
Optus Mobile Review ALDI Mobile Review Amaysim Mobile Review Belong Mobile Review Circles.Life Review Vodafone Mobile Review Woolworths Mobile Review Felix Mobile Review Best iPhone Plans Best Family Mobile Plans Best Budget Smartphones Best Prepaid Plans Best SIM-Only Plans Best Plans For Kids And Teens Best Cheap Mobile Plans Telstra vs Optus Mobile Optus NBN Review Belong NBN Review Vodafone NBN Review Superloop NBN Review Aussie BB NBN Review iiNet NBN Review MyRepublic NBN Review TPG NBN Review Best NBN Satellite Plans Best NBN Alternatives Best NBN Providers Best Home Wireless Plans What is a Good NBN Speed? Test NBN Speed How to speed up your internet Optus vs Telstra Broadband ExpressVPN Review CyberGhost VPN Review NordVPN Review PureVPN Review Norton Secure VPN Review IPVanish VPN Review Windscribe VPN Review Hotspot Shield VPN Review Best cheap VPN services Best VPN for streaming Best VPNs for gaming What is a VPN? VPNs for ad-blocking For gamers, though, Xbox DVR is a term that refers to capturing gameplay footage, which is slightly different depending on whether you’re capturing that game footage on an Xbox One console or Windows 10 PC. Read on to find out about the differences between the three. Long story short: Xbox DVR for TV doesn’t exist and you shouldn’t look to your Xbox One as a replacement for other DVR solutions. To record, simply tap down the Xbox button on your controller to bring up the share screen. From here, you can either start recording manually to capture what you’re about to do, or use it after you’ve done something cool to retroactively record what just happened. Hit Y to capture a screenshot. Tap X to record what just happened. Hit the View button for more capture options. Or press the Menu button for more options. Capture options let you select whether you want to record the last 15 seconds, 30 seconds, 45 seconds, one minute, or two minutes. To manually record, tap the Xbox button then use the bumpers or joystick to tab over to the ‘Capture & share’ tab on the far right. This has familiar options for capturing screenshots and the duration for recording what happened, but it also lets you manually ‘Start recording’. From here, you can also ‘Share last capture’ to your activity feed, send it as a message, or post it on Twitter. Additional sharing options let you share to a Club or upload it to your OneDrive. You can also select ‘Recent captures’ to see all of your captures, sorted by most recent, with the resolution listed next to them. At the bottom of this page you’ll find a ‘Capture settings’ option that acts as a shortcut to tweaking more Xbox Game DVR settings. Up top is a bunch of shortcuts for showing which screens are active (indicated by an orange underline); just click to add or remove the tabs or click on the Widget Menu to see additional options. There’s also a settings menu with even more options. The Capture tab tells you what you’re capturing and also lets you take screenshots, record footage, mute your microphone, or view all captures. Below that is the audio mix, which lets you pick the audio output (Mix) device, as well as the different levels for each, and input (Voice) device, which is handy for those with multiple microphones. At the bottom left of the default overlay is a Performance tab that gives you at-a-glance information on CPU, GPU, video RAM, and memory usage, as well as an FPS counter. There’s a graph to show fluctuations based on each clickable entry. Following along on this theme, the centre of the default layout has a Resources tab that displays top tasks and ranks them in terms of impact: red for high, yellow for medium, and green for low. Finally, on the right by default is the Xbox Social channel which, if you’re logged into your Xbox account, will display your online status, as well as your online friends, as well as text and voice chat options.